How to Generate User Specific Reports ?
Intoduction
This document contains information about how to generate user-specific reports using report bursting. User-specific reports have their own data. The user can not see another user's data, he has a report containing only data for which he is authorized or provided access.
Report Bursting: This video contains how to generate user-specific reports in OPNBI.
Objective
The objective of this document is to understand how to generate user-specific reports.
Prerequisites
Order Details Report
Order Details Dataset
For downloading Order Details Dataset and Order Details Report click the link below:
Download Order Details.zip file from Here
This document has step-by-step information on how to use Report Bursting and will show one use case example.
Use Case
Report Bursting will be used in a condition when multiple reports are required to be generated and shared with relevant users at a specific predefined time period. Consider the scenario where we have a BIRT report which contains the information of orders details of the provided order number.
This report has a parameter for the order number and it will ask the user to enter a valid order number when executed and it will provide order details for the entered order number. Generating order details for 1 or 2 customers is easy, you just need to run the report manually from the report section and share reports with a user.
But in a case when we need to share order details with all customers on a weekly or monthly basis, manual report generation for each and every user will be very tedious and time-consuming as well.
Let's assume we have to generate and share 1000 order details reports. In order to save time, we need to remove manual intervention and automate this process of report generation. At this stage use of Report Bursting is advantageous. In report bursting, we will get all customer number information in a dataset and map this dataset with a report using Report Bursting.
After mapping when we run this mapping, a report will fetch one by one order numbers and generate a report for all the order numbers available in the dataset. We can share the report in a different format for different users in just one click And by using email functionality we can Email individual reports to the relevant user directly.
In this Scenario, we have demonstrated report bursting with order Details report and for the order number, we create or use a dataset that has order number information. Then we map the report with a dataset
- Follow the below steps to get a hands-on with Report Bursting Functionality.
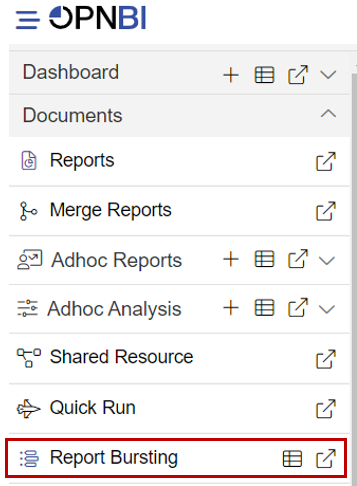
Click on Hamburger Icon.
Go to the Document section and click on Report Bursting, As shown in the figure below:
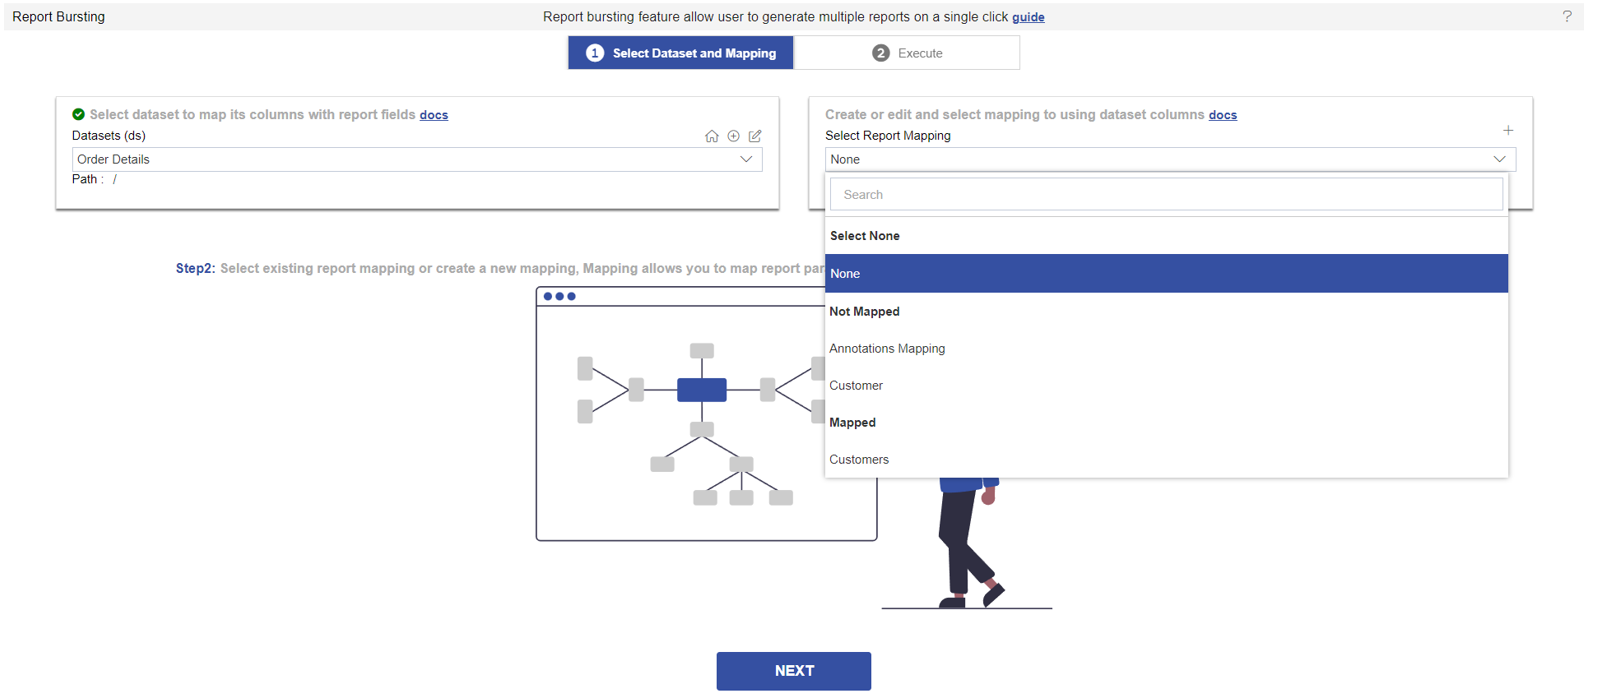
Enter the following details in the Select/ Create Mapping Page.
Dataset: Order Details (Create or Select the dataset based on Report parameter, make sure dataset contains unique values)
- Select report mapping to create a mapping with a dataset.
If you are doing it the first time and there is no mapping created, select report mapping dropdown will show no data. But once the mapping is created or you have existing mapping you can see mappings in the select report mapping dropdown.
In case you have some mappings created, when you select a dataset you will see all available mapping lists under select report mapping, and also you will see all mappings are grouped by Mapped and Not Mapped Keywords.
If you have created mappings with the selected dataset earlier then you can see your mapping in the Mapped list and other mappings are grouped in the Not Mapped List as shown in the below screenshot
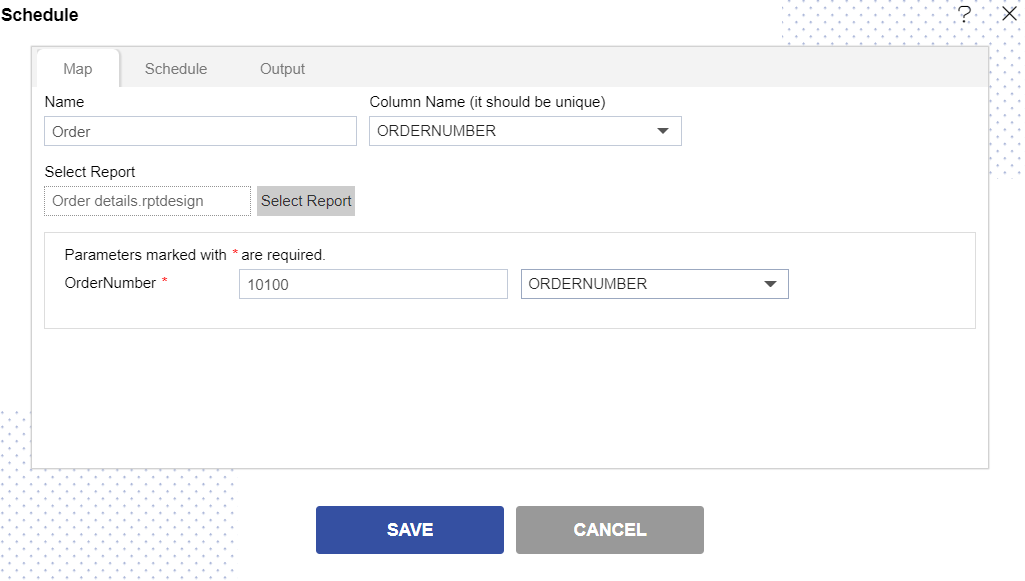
To create a new mapping with selected DS, click on the + icon and It will display the following page.
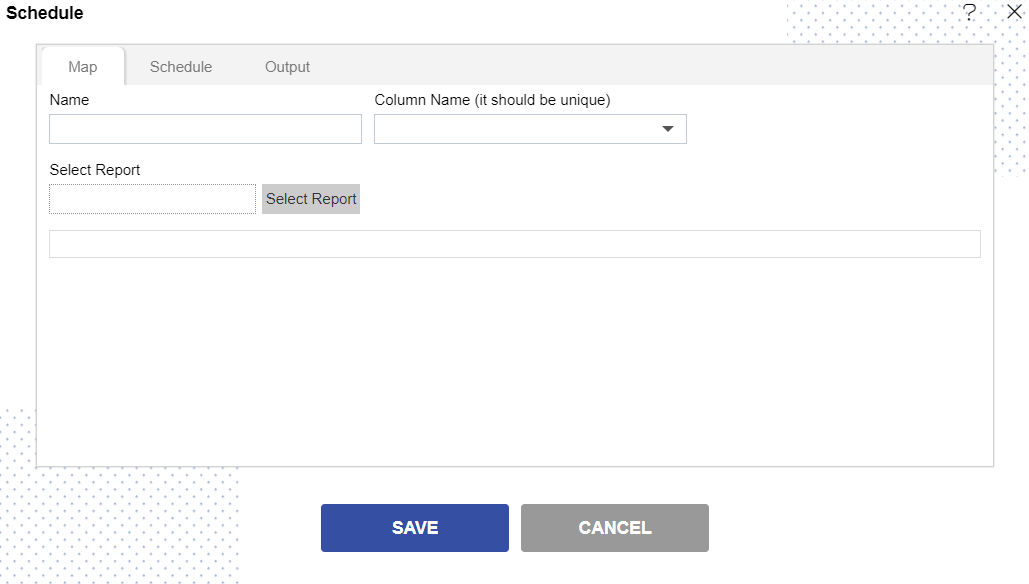
Enter the following details in the Schedule Page.
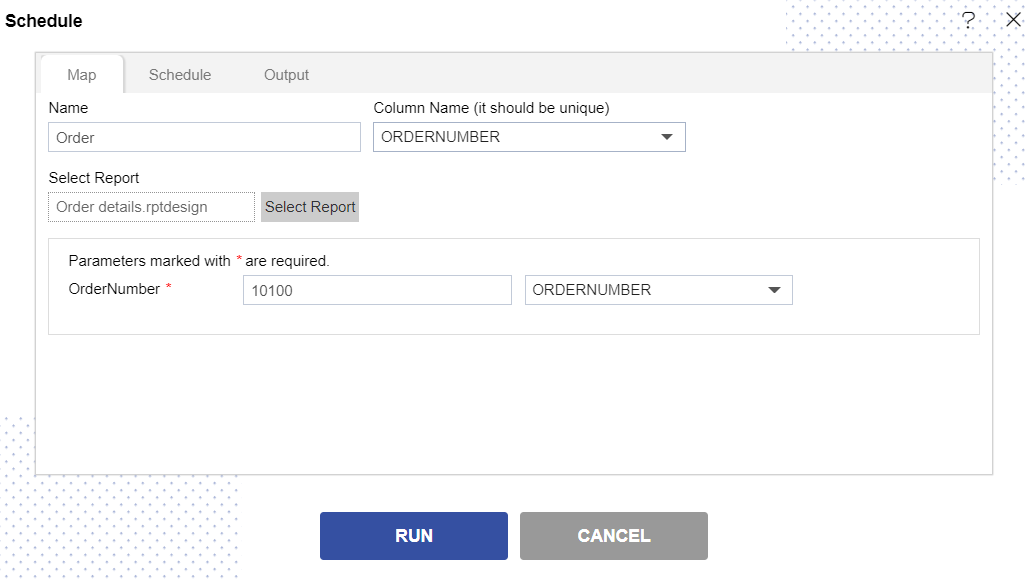
Name: Order
Column Name: OrderNumber (It should be Unique)
Select Report: Order Details.rptdesign
OrderNumber: 10100, OrderNumber
Fill above details, as shown in the figure below:
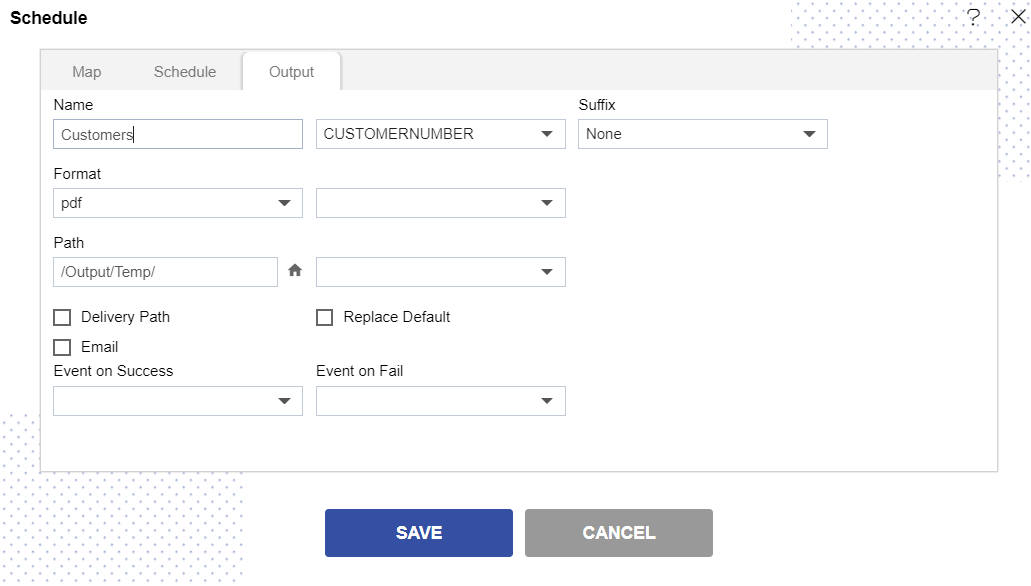
Click on the Output Tab.
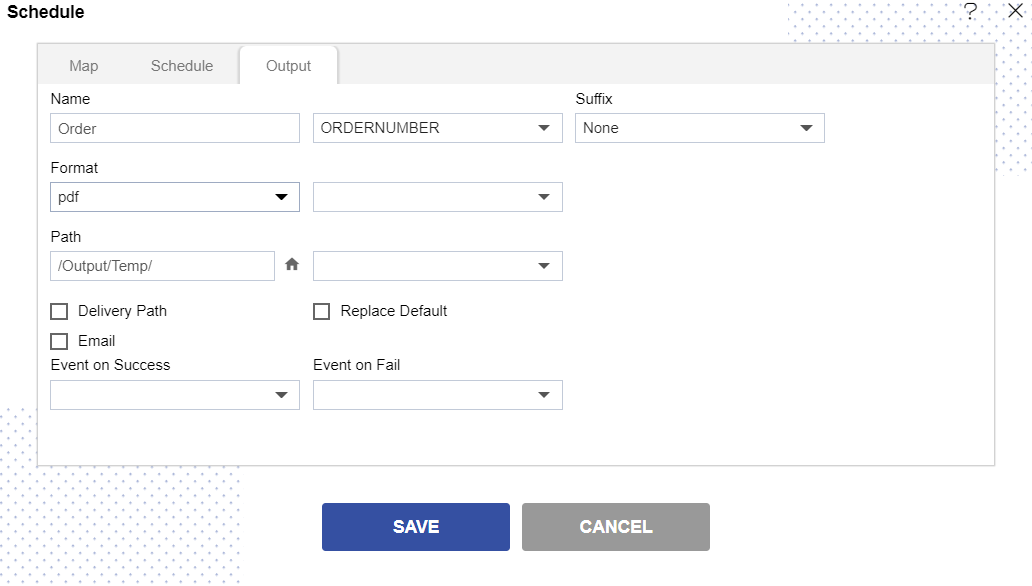
Enter the following details in Output Tab.
Name: Order
Select OrderNumber column in dropdown List.
Suffix: yyyyddMM_HH-mm-ss (optional)
Format: Pdf (Select the format in which you want to generate the output from the dropdown menu)
Path: /Output/Temp/ (specify the delivery path on your computer where the reports will be downloaded)
Fill above details, as shown in the figure below:
Click on the Save button and it will display the message Created Successfully, as shown in the figure below:
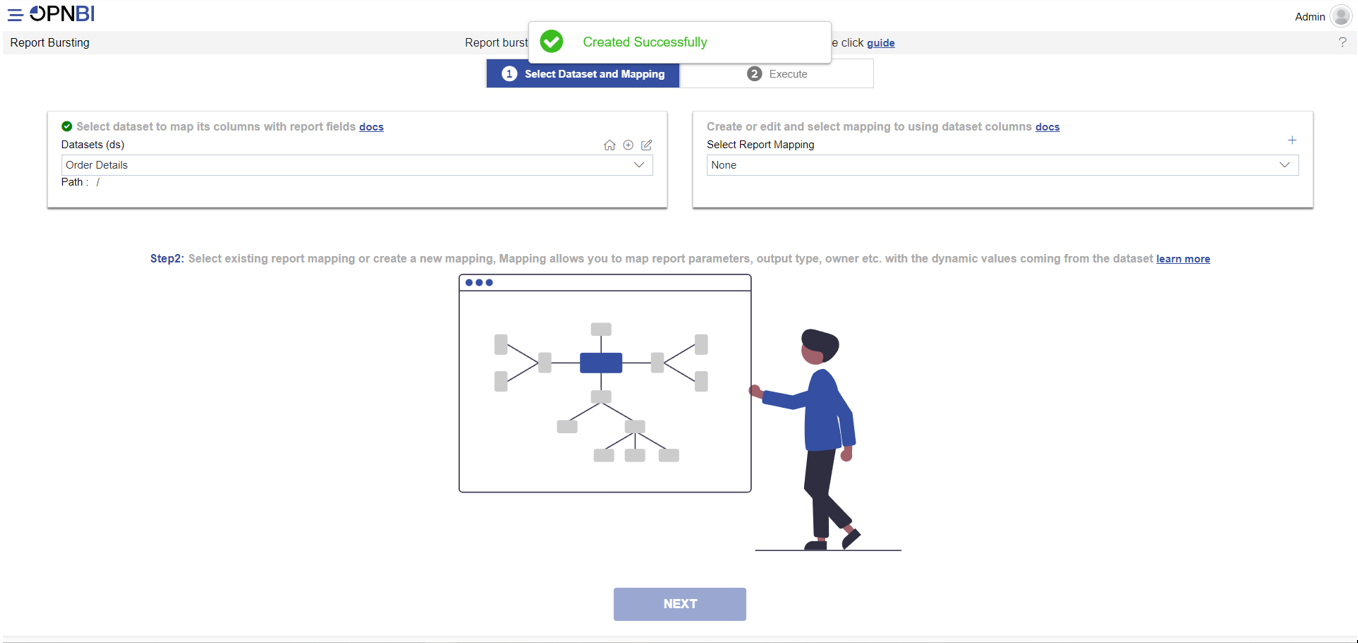
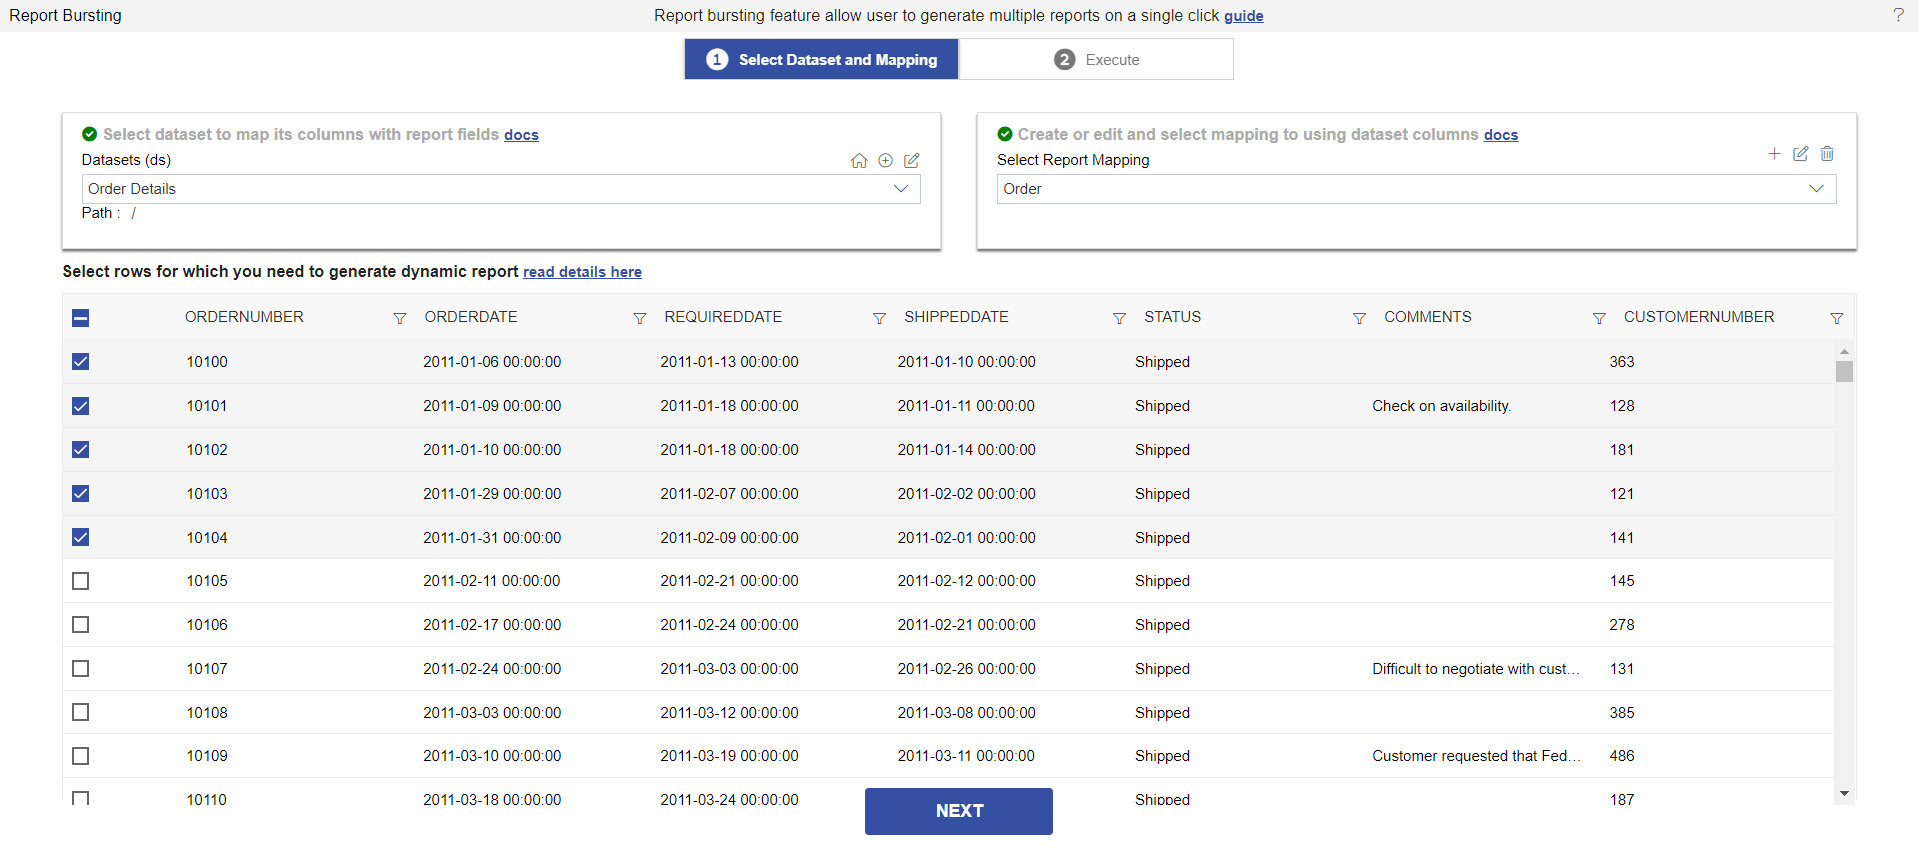
In Select Report Mapping Dropdown select the Order.
It will display all the Customer Order number details, here you have to select the OrderNumber for whom you want to generate and share the report.
In this example I am selecting the first five customers OrderNumber, as shown in the figure below:
Click on the Next Button.
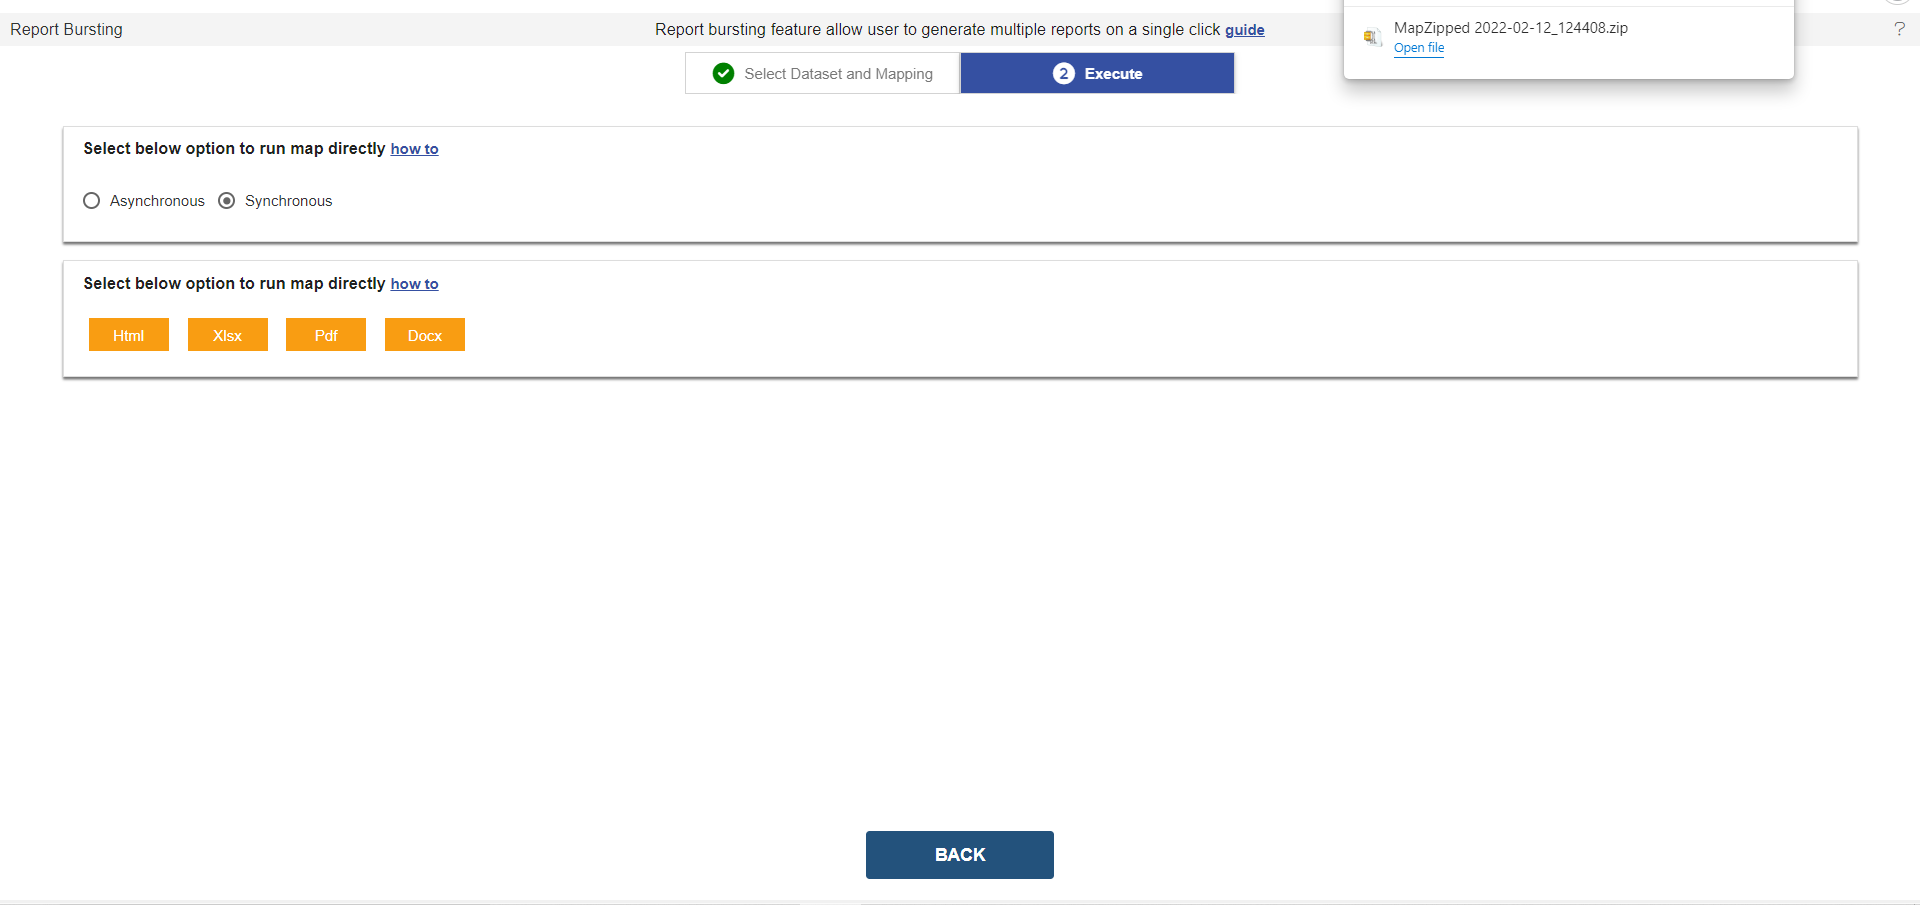
In Execute Page there are two Scenarios.
Asynchronous: Reports will be generated but will not be downloaded.
Synchronous: This will work only in right now scheduling frequency. And User who is running this mapping will receive a zip file containing all reports for a selected number of users in the specified format. (zip file will be downloaded in his machine)
Asynchronous
Select the Asynchronous radio button and select the format in which you want to generate the output here I am selecting the pdf format, Wait till you get the message of Group Schedule Successfully, as shown in the figure below:
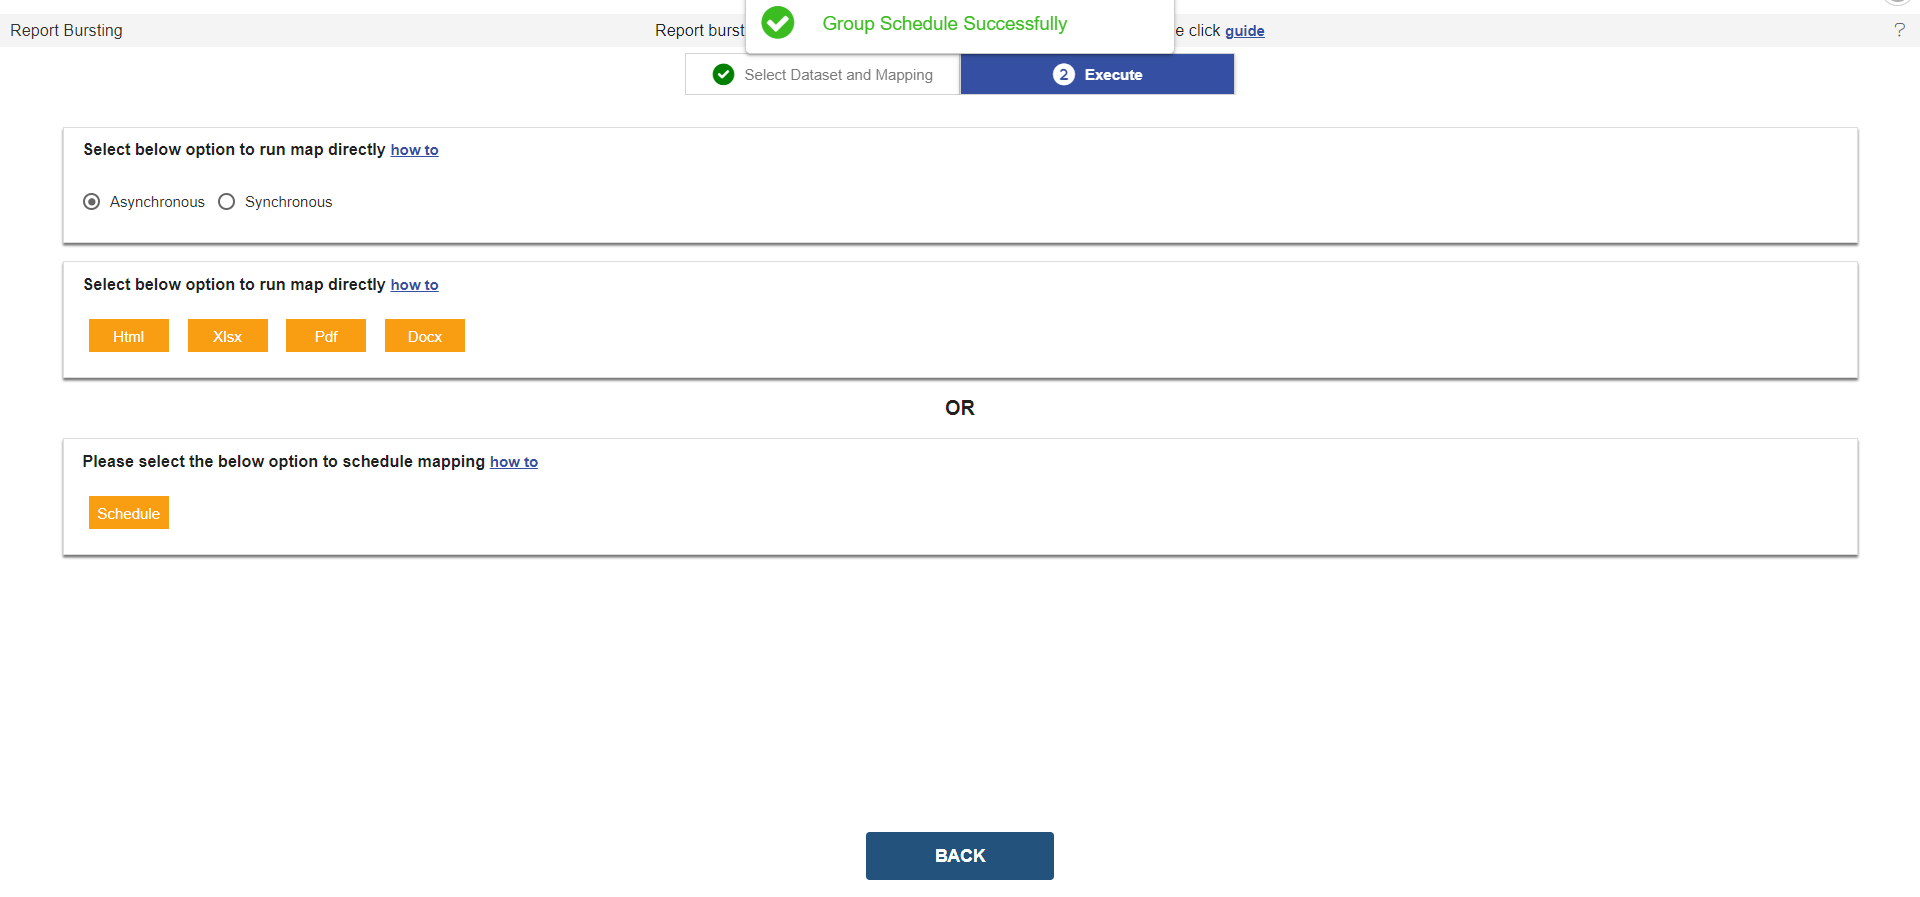
Click on the Schedule button to schedule the report.
You can check the list of reports generated in the request section as well in the output>Temp folder of the report section.
You can also schedule the frequency of mapping by using the schedule button given below.
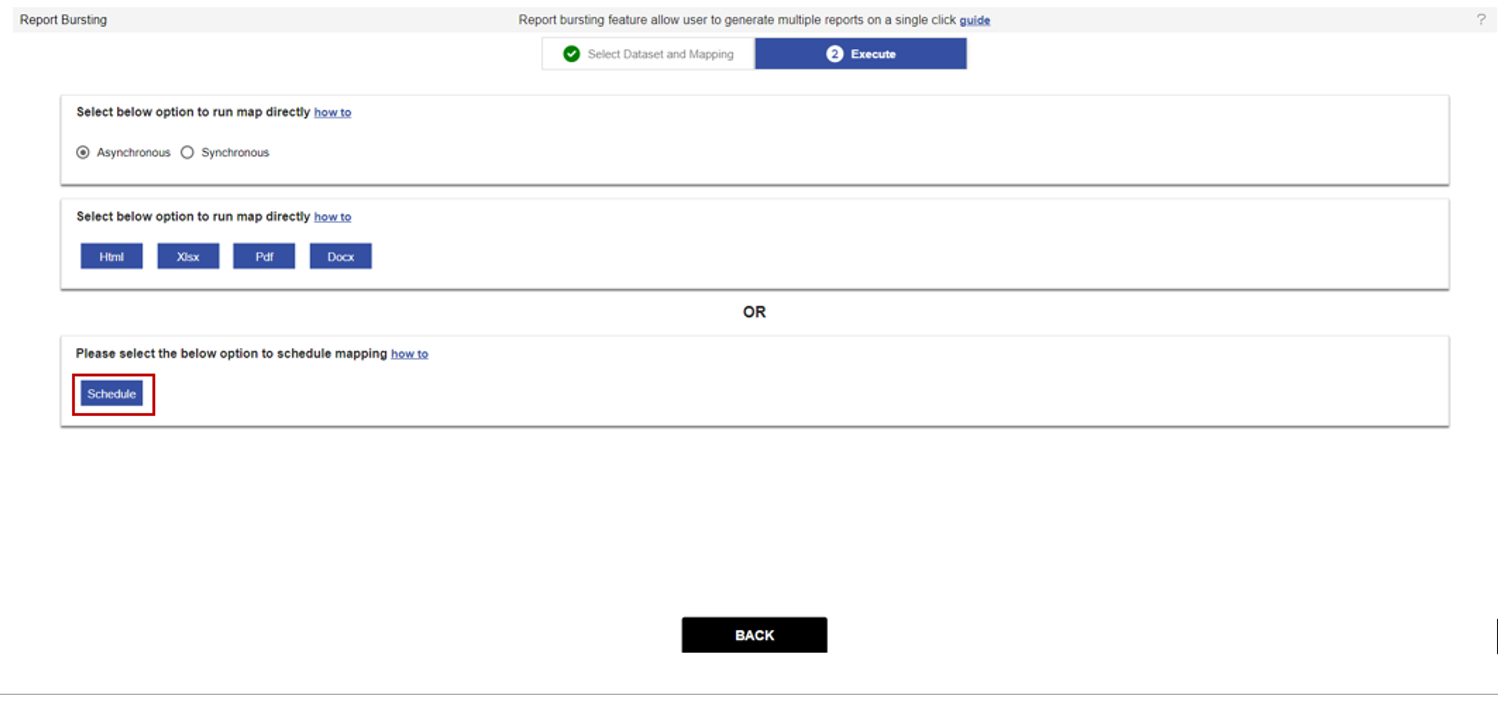
Click on the schedule button and Enter the following details in Map Tab, as shown in the figure below:
Column Name: OrderNumber
In the Schedule Tab you can set the frequency as per your requirements.
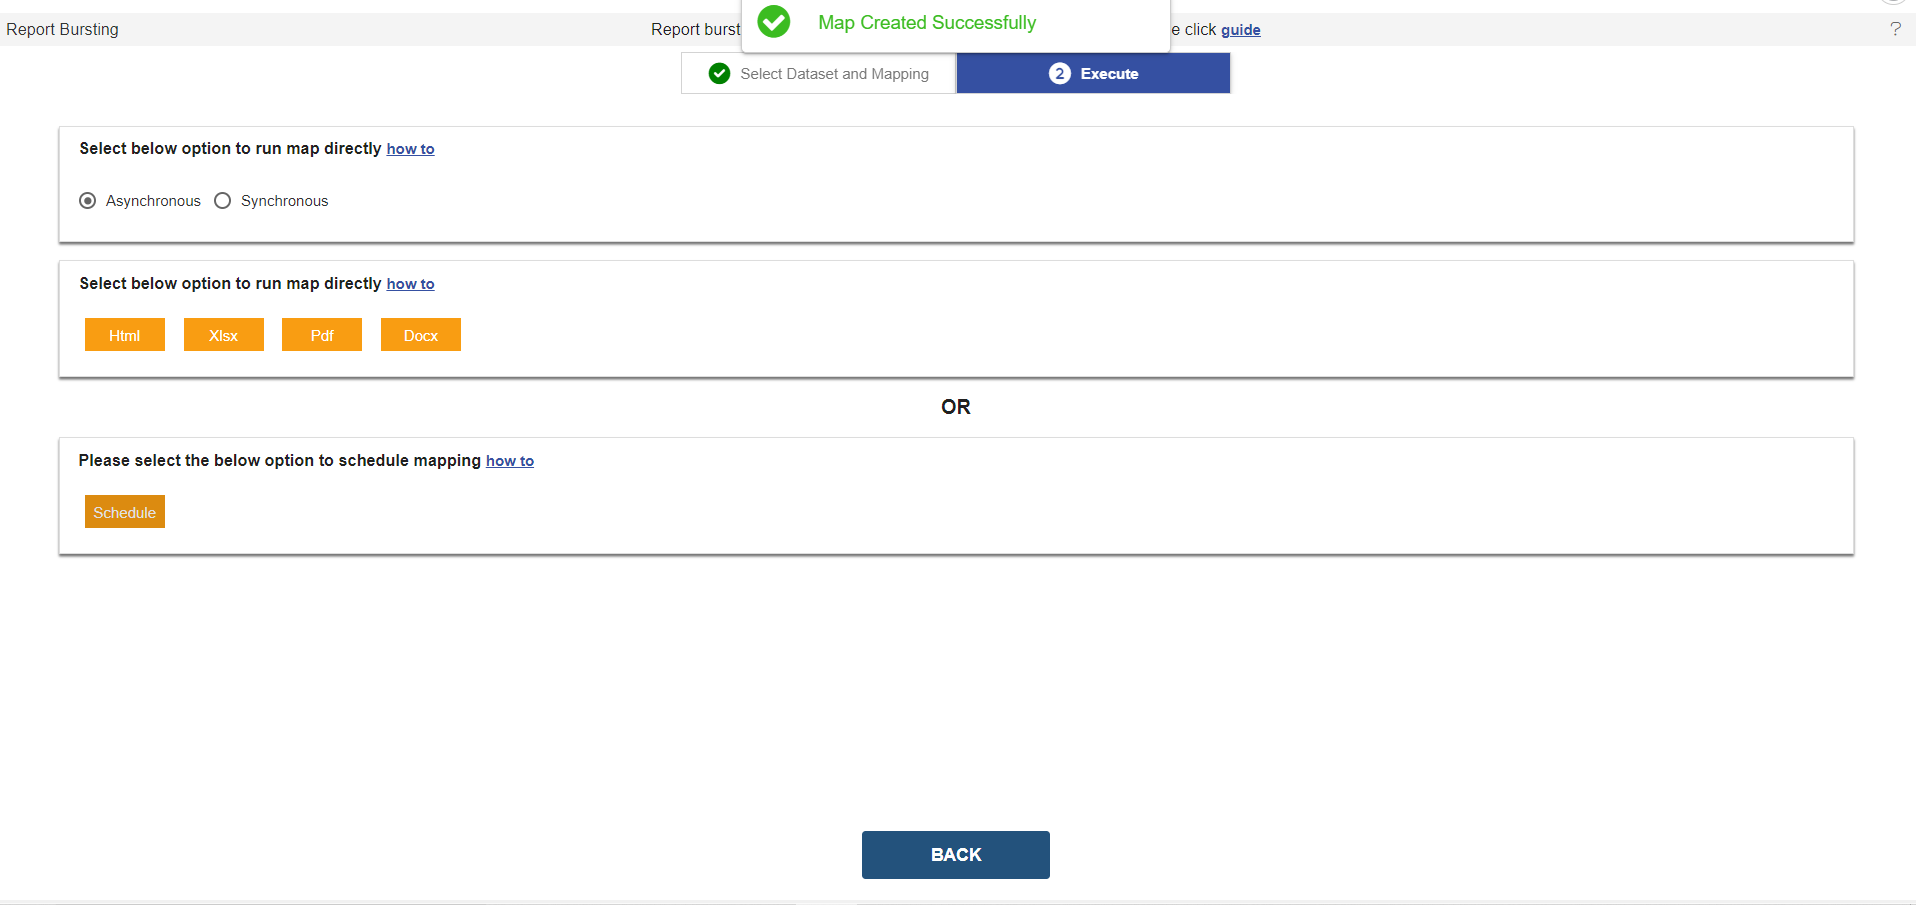
Click on Run Button and wait till you get the message of a map created successfully message, as shown in the figure below:
- You can check the list of reports generated in the request section as shown in the figure below:
For Report Output go to the Documents section in that Output>>Temp folder.
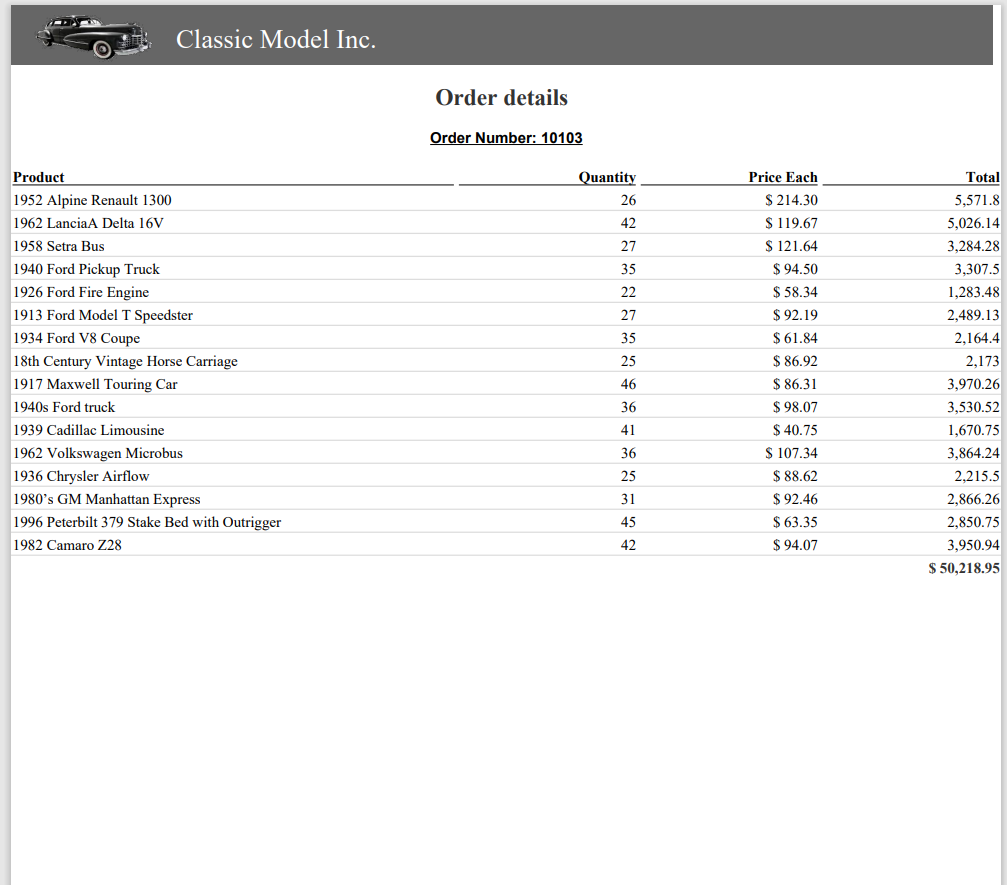
In the Temp folder you can see different reports with different content as per the order number applied. report saved with order number name.
In Asynchronous user can see the output report, as shown in the figure below:
Synchronous
In this manner, mappings can be run with only 4 output options provided that is HTML, Xlsx, PDF, and Docx.
In order to run mapping, click on any option and wait till you see a success message on top.
As soon as reports are generated, all reports will be downloaded to your machine in a zip file.
